
How to simulate a new location?
1. How to add a new location marker ?
Step 1: Go to the Location Planning module.
Step 2: Open the new location. There are two options to do this:

- If you don't know the correct address: first zoom in on the exact area on the map and drag & drop the Add a new location marker from the left side panel on that exact area where you want to open the location.
- If you know the address, zipcode, place name or the coordinates: enter it in the search box in the top left corner of the map. Next select the right option from the list of possibilities that appear to place a marker on the map. Click on the orange marker that appears after this to open the location, or drag and drop the orange marker in case it still needs some adjustment. Check also 'validating drivetime connection below' why the right geographical position is important!


Whether you used option 1 or 2, a first pop-up window will immediately appear.
Step 3 (optional): Validate the geographical position of the dropped marker on the mini-map. If the marker still needs some adjustment, click the 'Move location' button to reposition the marker.
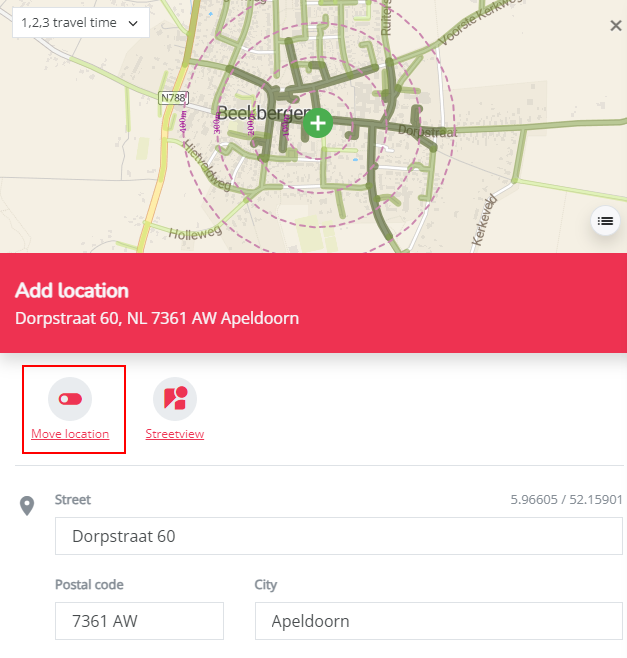
The following message will appear: “Click on the (mini-)map to update the marker location”.
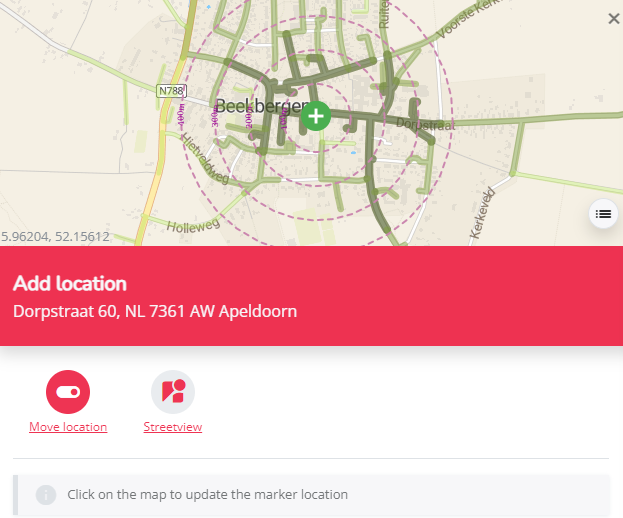
You can now use the minimap on top to update the position of the marker: hold your click to move around the minimap to look for the new best geopgraphical position. The place where you single click on the mini-map will become the new geographic position of the location. The new marker will appear on the new position. Note that the connection road network map layer might change accordingly to the new position. (See also the next section; validating drivetime connection)
Step 4: Next, indicate whether you want to open an own location, a location of a competitor or a local activity location.
Depending on the type of location you want to open, you can choose from a list of possible brands (the brands need to be configured for your platform). Once you selected the right brand, the location will be automatically assigned a name (which you can edit). Press apply at the bottom of the pop-up window to got the next screen.
2. Validate drivetime connection
Step 5a. Double check the micro accessibility situation of the new location.
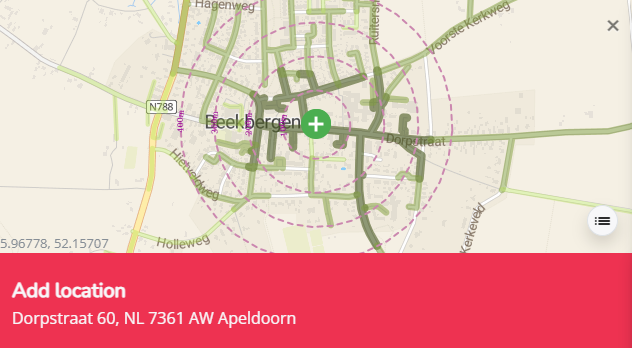
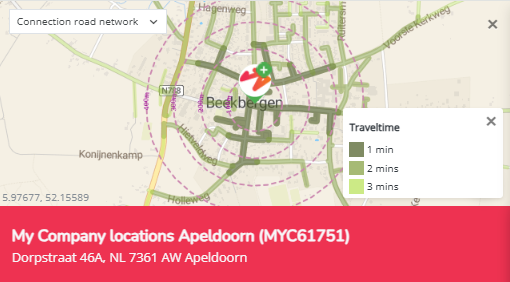
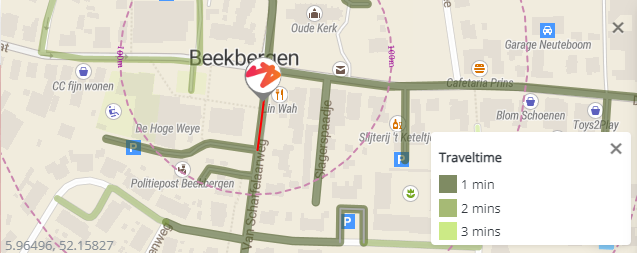
Use the mini map on top op the location pop-up window to validate the connection of your location to the road network. Make sure you see the map layer 'connection road network' (top left corner, normally displayed by default). You can display the legend (bottom right corner) to understand the green line coloring:
- 1min (dark green) are the road segments that can be reached within 1 min drivetime from the location
- 2min are the road segments that can be reached within 2 min drivetime from the location
- 3min (lightest green) are the road segments that can be reached within 3 min drivetime from the location
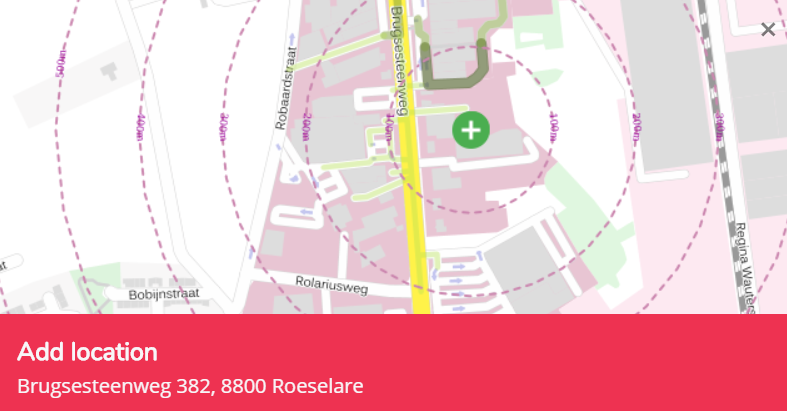
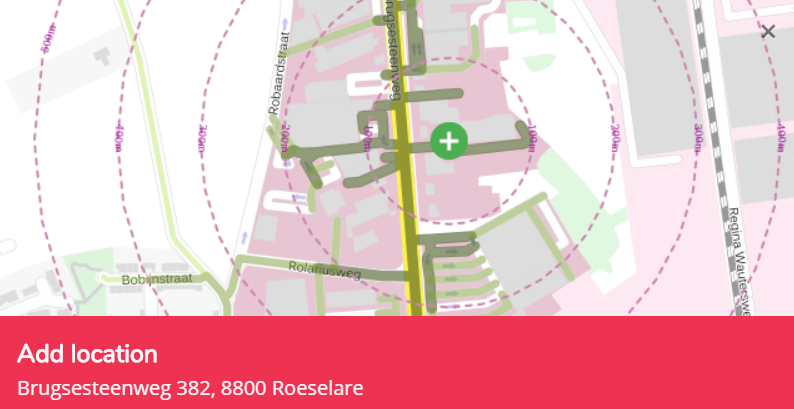
It is very important that the location is correctly connected to a road segment. This because our module operates on drivetimes for the calculation of catchment areas. For example, it may occur that a location is located inside a large retail park and because the marker is dropped on the exact position of the shop, it will rather connect to the parking lot instead of the road segment from which most customers enter the parking lot. As a result the drivetimes will not get calculated correctly and the underestimation of the catchment area will result in a lower prediction.
Example: On the first picture, the marker is not connecting to the correct road segment which results in an underestimation of drivetime calculation. By slightly adjusting the marker, the result can be completely different, as can be seen on the second image. The darkest green displays the road segment that can be reached within 1 minute from the location. The lightest green colored road segment can be reached within 3 minutes of the location.

Remark: In case it's not possible to drop the marker on a location that gives you realistic drivetimes because of micro-accessibility issues, you can still adjust the situation by adapting the micro accessibility parameter in step 6
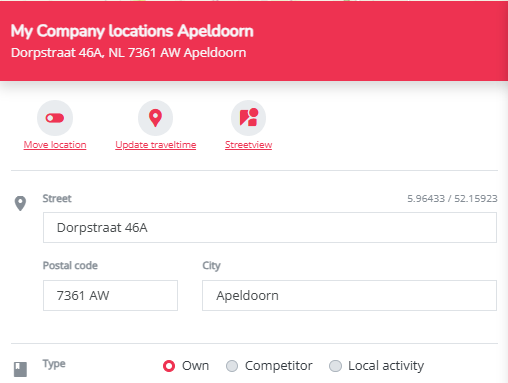
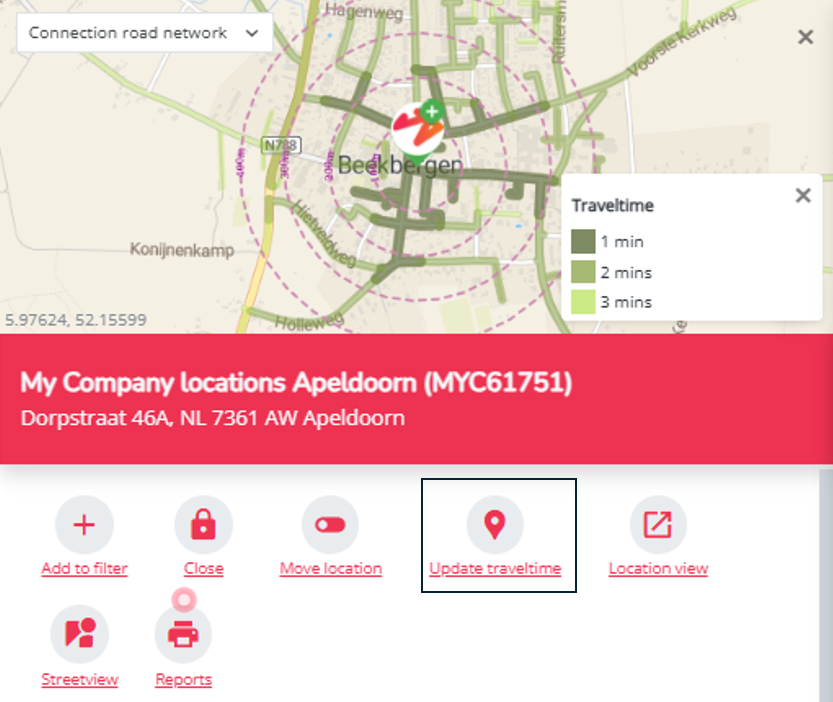
Step 5b. Update the traveltimes (without adjusting the geographical position of the marker).
- Click the 'Update traveltime' icon. A textbox will appear "click on the map to select a different road segment to start from"
- Click on the correct road segment for the new snapping of the traveltimes. A red line will appear on the clicked road segment. Click Apply to finalize the new traveltime snapping.
-
3. Score the micro environment
When scrolling down in the same pop-up window, you'll notice a list of location characteristics. All characteristics are set on a default value, depending on the selected brand within the first screen (own, competitor or local activity). You can alter the relevant location characteristics if needed. If you do not know the correct value of the location characteristic yet, you can leave the default values which will have a neutral impact on your location result.
Remark! Default values will be filled in for all characteristics; both for competitors and own locations. This does not mean they play a role in the model and have an impact when changing! It's most important that you know (by consulting the delivery presentation) which characteristics have an impact for your own brand so you can alter those correctly. The same list of characteristics will be presented for competitors although we don't calculate with those values as they are not known.
Step 6: Indicate the right value for each location characteristics that plays a role in the model. Other ones (non sensitive characteristics) are descriptive and can be indicated correctly for a good reading of the report.
Parameters that are automatically calculated, such as urbanization or local acitvity cross visit potential, are colored light grey and cannot be adapted. In case you want to overrule one of these (e.g.: to simulate a new retail cluster), please contact your RetailSonar consultant.
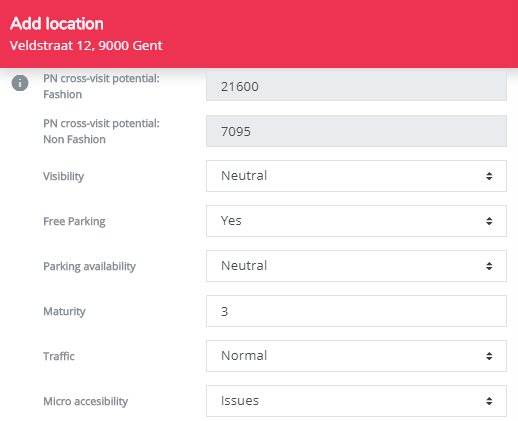
All visibility, experience and convenience indicators have to be correctly and consistently scored. The impact of scoring these characteristics differently will depend on how your platform is configured. Their sensitivities are included in the predictive model, so it goes without saying that incorrect scoring can have a major impact on the outcomes. To obtain reliable results you can benchmark these values with values for other existing locations that you consider similar. If you have issues doing this, please contact your RetailSonar expert to help you out.
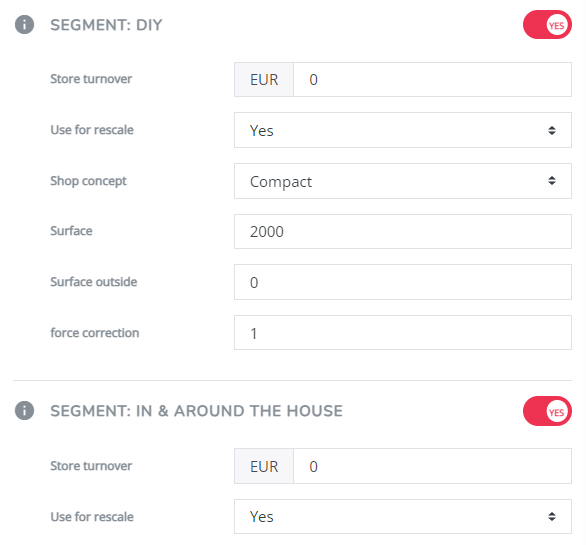
Some location characteristics are segment dependent, e.g. surface. In this case, make sure you have entered the correct value for each segment. The characteristics that play a role in the different segments have to be filled in for each characteristics seperately at the bottom of the pop-up.
Important remark! In case you had an over/underestimation of drivetimes after step 5a, you can indicate the micro accessibility characteristic to a more negative/positive value so that you can simulate a more realistic situation.
Step 7 (optional, only if configured): Validate the passage value in case the passage and/or footfall layer is configured in your platform. Consult the article on confirming/updating the default car passage & footfall.