Upload and update zone characteristics
Introduction
You may find it helpful to upload your own zone characteristics to your platform. For instance, if protection areas matter for your network, you can upload the right zone attributes by following these steps.
How to
A) Uploading zone characteristics
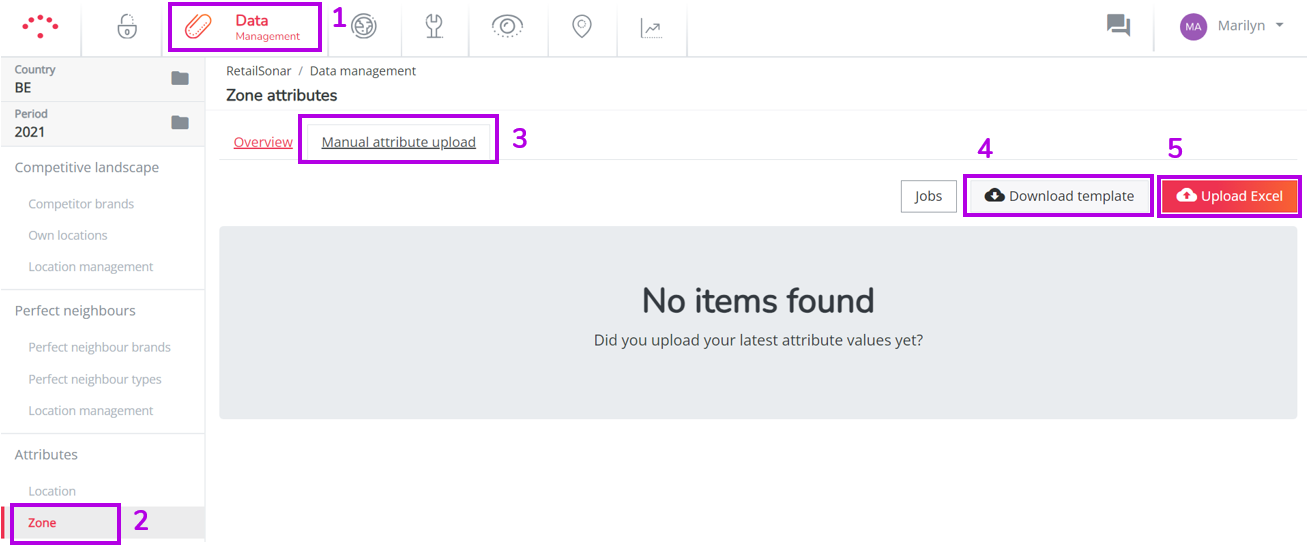
- Go to the Data Management module
- Select the correct country and period for which you want to upload data in the upper left corner.
- In the "Attributes" section, select the "Zone" page:
- Click 'Manual Attribute Upload'
- Click on 'Download template' and 'Template with latest value'. This template includes all zones and their latest uploaded values
- Modify the values in the correct* column in the template
- Save your updated Excel file
- Upload the modified excel template on the same page.
- Visualize the modified or added zone layer in the Marketing Efforts module

*Remark! Contact your RetailSonar consultant if you want to include a new zone attribute in your platform that hasn't been defined yet.
B) Upload zone characteristics of a new location
- Create a simulation for the new location in Location Planning module. For more information about creating simulations, please click here.
- Save your simulation in Location Planning and open it in Marketing Efforts
- Define the desired environment around the location
- You can add (or remove) zones by clicking on the specific zones you want to correct and adding it to (or excluding it from) the filter. You can find the steps to do this in section 2A of this article.
- Download the defined area as an Excel file
- Select Zone as your export type
- Follow steps from A) Uploading zone characteristics
Remarks!
- Updated zone characteristics are visible to all users.
- Simplify this process by making using the ability to save your custom filters

